





4 Best Free Image Compression Tools for Shopify

High-quality images are essential for any Shopify store. Product photos help customers understand what they’re buying, while banners and other visuals make your storefront more attractive.
However, large image files can slow down your website, especially on mobile devices. Compressing images is one way to reduce file sizes without noticeably affecting visual quality.
Shopify already optimizes images automatically, but preparing appropriately sized images before uploading them can still be helpful.
In this guide, we’ll introduce four free image compression tools for Shopify and explain how to use each one.
Best Free Image Compression Tools for Shopify: Quick Comparison
| Tool | Platform | Best For |
|---|---|---|
| Squoosh | Web | Quality control |
| TinyPNG | Web | Quick compression |
| ImageOptim | macOS | Desktop optimization |
| Caesium | Windows, macOS, Web | Batch compression |
All four tools offer free compression options, but each is suited to a slightly different workflow.
1. Squoosh — Best for Fine-Tuning Image Compression
Squoosh is a free, open-source image compression tool developed by Google Chrome Labs.
Its biggest advantage is the ability to compare original and compressed images side by side while adjusting compression settings.
Squoosh also processes images locally in your browser, so your image files aren’t uploaded to a remote server for compression.
How to Compress Images Using Squoosh
Step 1: Upload Your Image
Visit Squoosh and drag an image onto the page, or click the upload area to select a file.
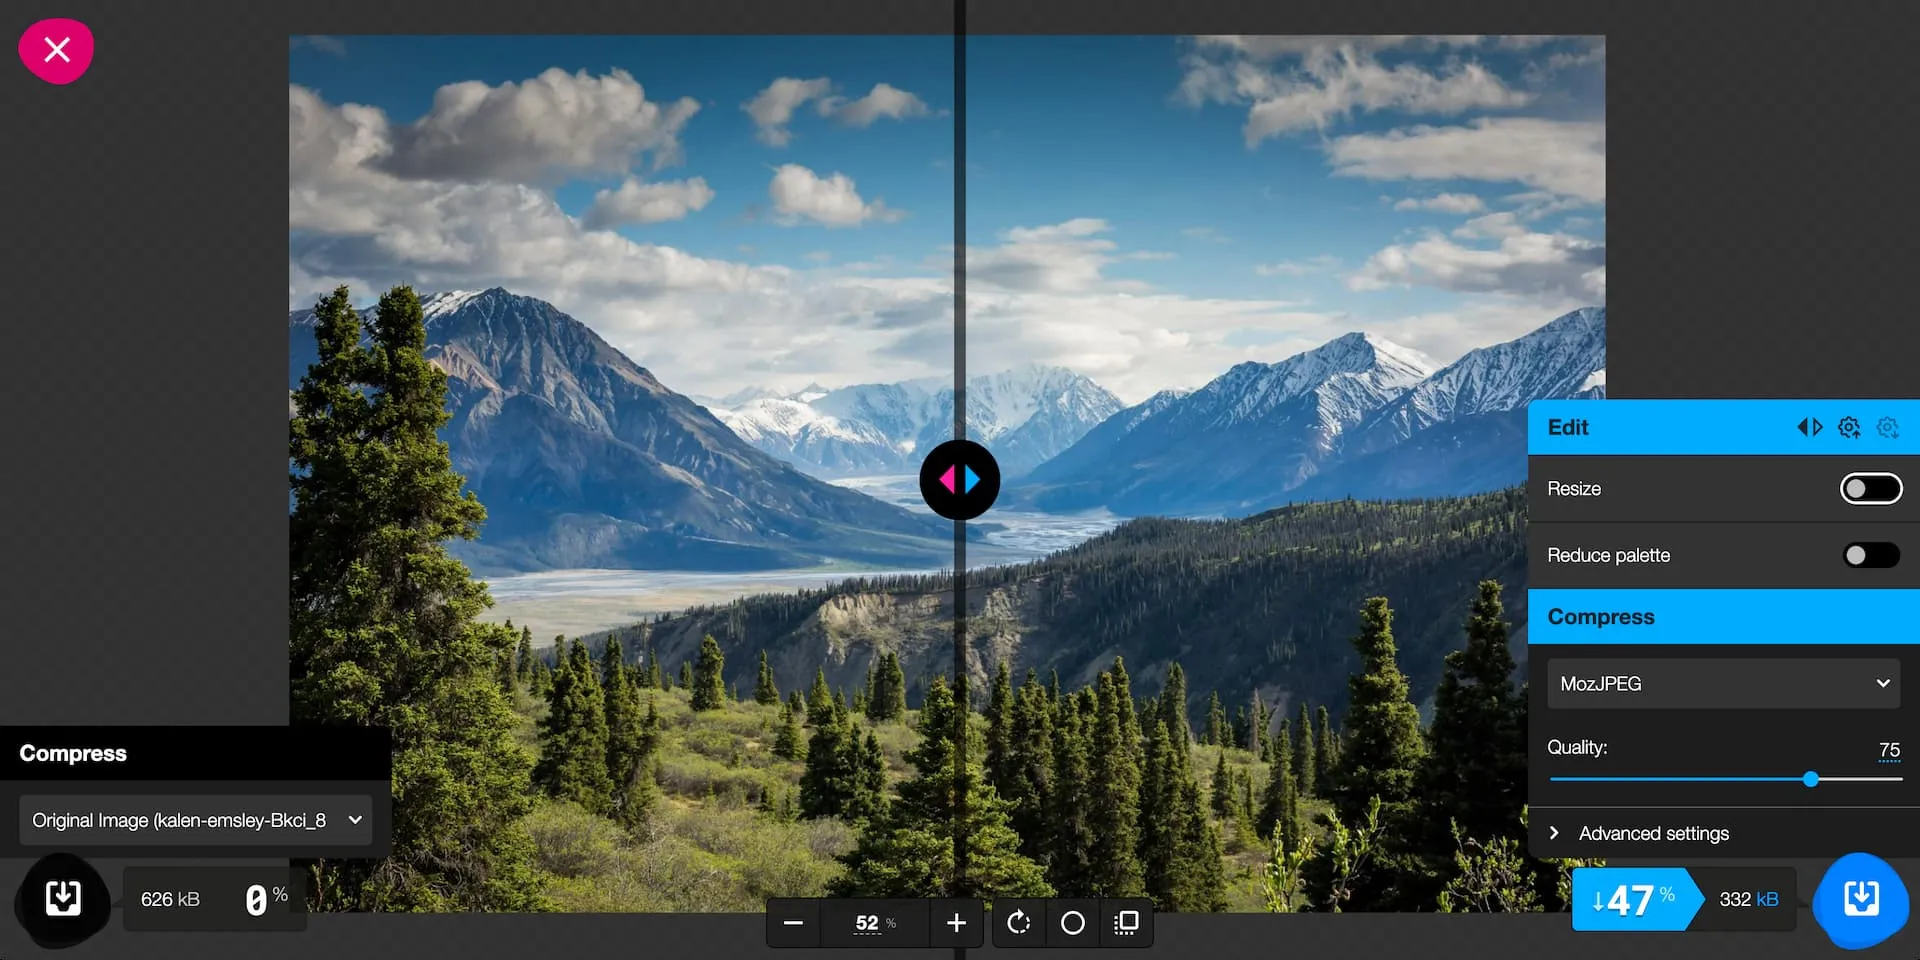
Once the image is loaded, you’ll see a split-screen preview comparing the original and compressed versions.

Step 2: Choose a Compression Format
In the compression settings panel, select an output format such as MozJPEG or WebP.
JPEG is commonly used for product photography, while WebP can often produce smaller files at comparable visual quality.
Drag the divider across the preview to inspect differences between the original and compressed images.
Step 3: Adjust Image Quality
Use the quality slider to adjust the compression level.
For JPEG compression, you can start with a quality setting around 75–85 and adjust based on the preview. Quality scales vary between formats, so always check the visual results rather than relying on a specific number.
As you change the settings, Squoosh displays the estimated file size, helping you balance compression and image quality.
Step 4: Resize and Download
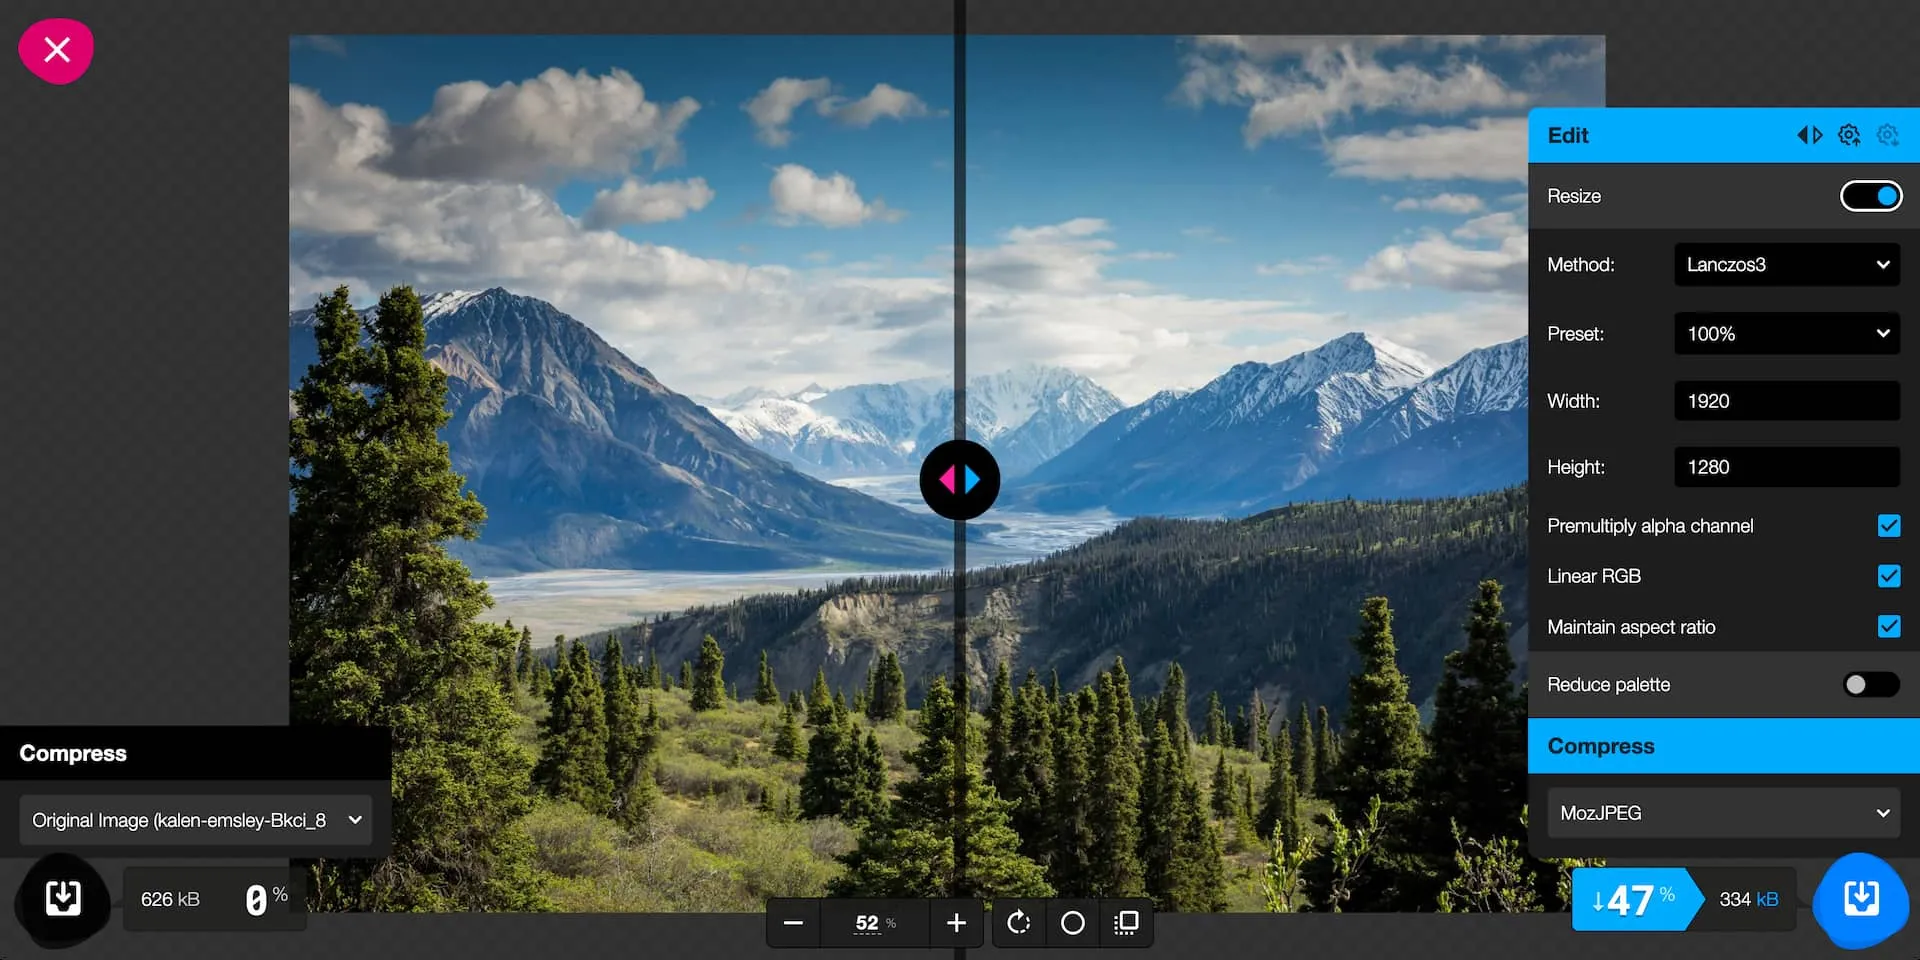
If the original image is unnecessarily large, enable the Resize option and adjust its dimensions while maintaining the aspect ratio.
Once you’re satisfied with the results, click Download to save the optimized image.
Why Choose Squoosh?
Squoosh is ideal when image quality matters and you want precise control over compression.
The side-by-side comparison is particularly useful for Shopify product photos with fine details. However, it’s less convenient for processing large batches of images.
2. TinyPNG — Best for Quick Online Image Compression
TinyPNG is an online image compressor that makes optimization simple.
It supports common formats such as JPEG, PNG, and WebP. Unlike Squoosh, TinyPNG automatically applies compression without requiring manual quality adjustments.
How to Compress Images Using TinyPNG
Step 1: Upload Your Images
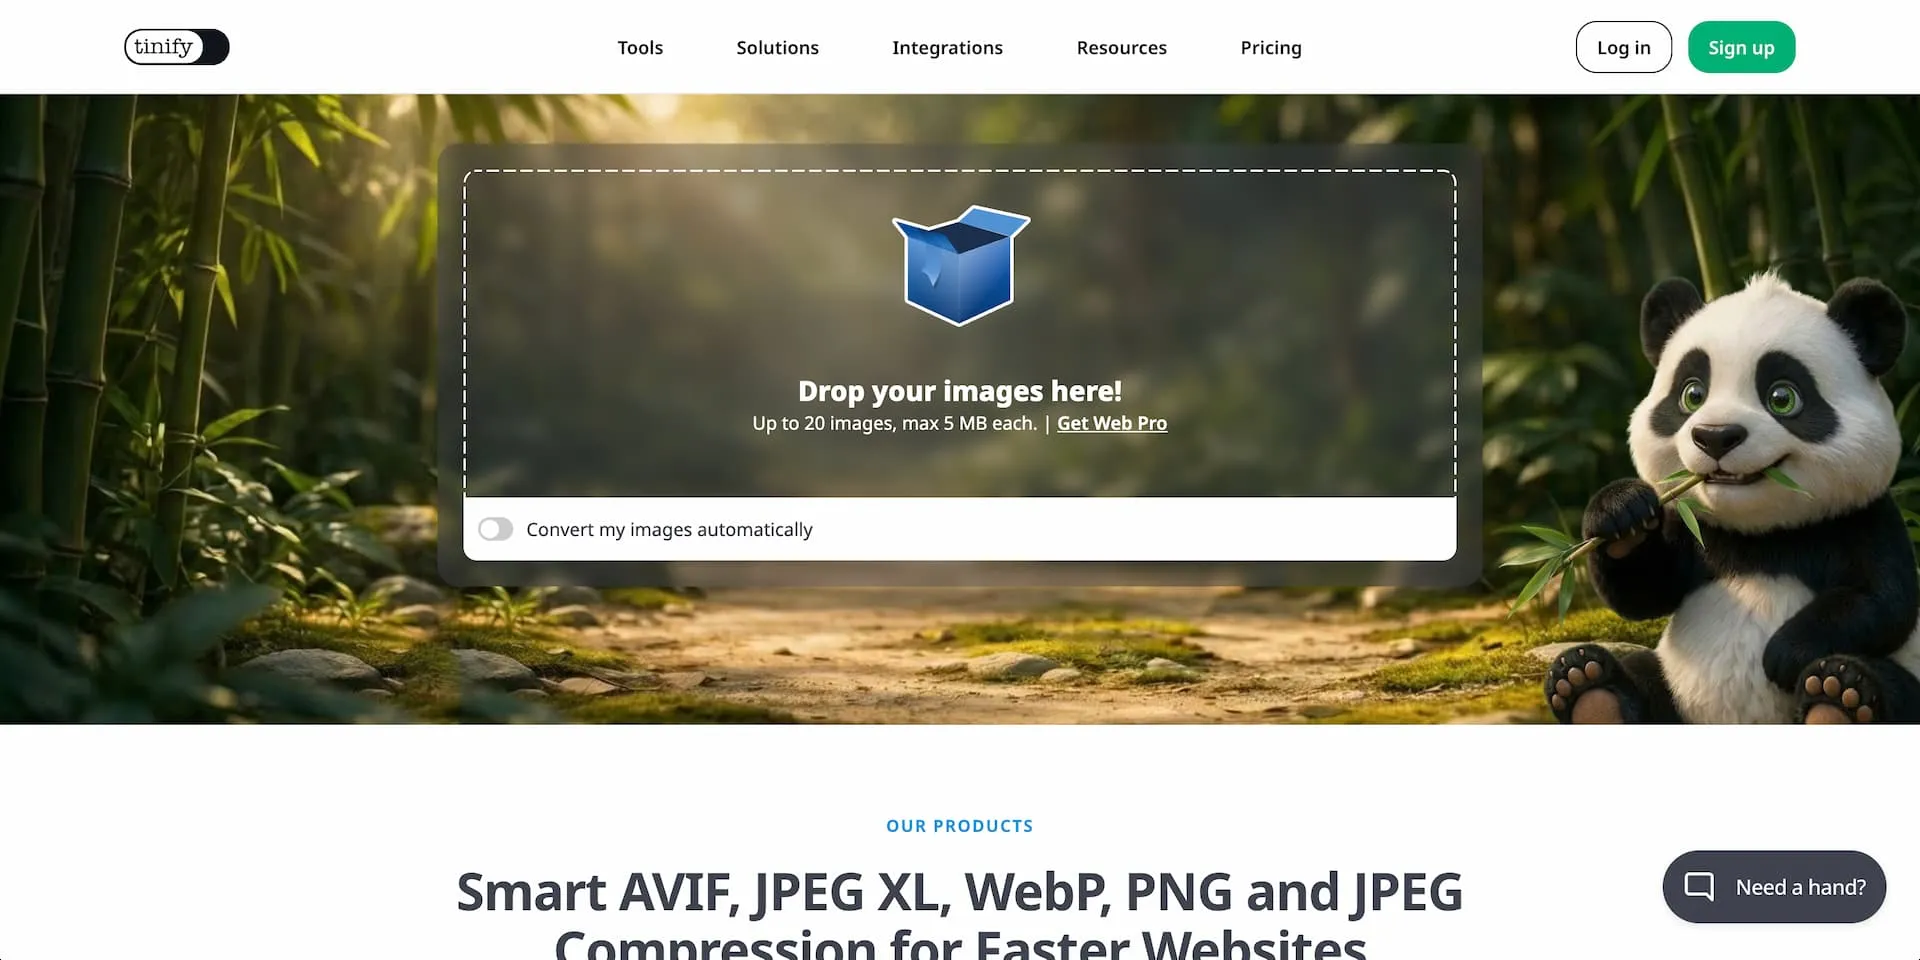
Visit TinyPNG and drag your images into the upload area.
You can upload up to 20 images at once, with a maximum file size of 5 MB per image on the free plan.
Step 2: Compress Your Images
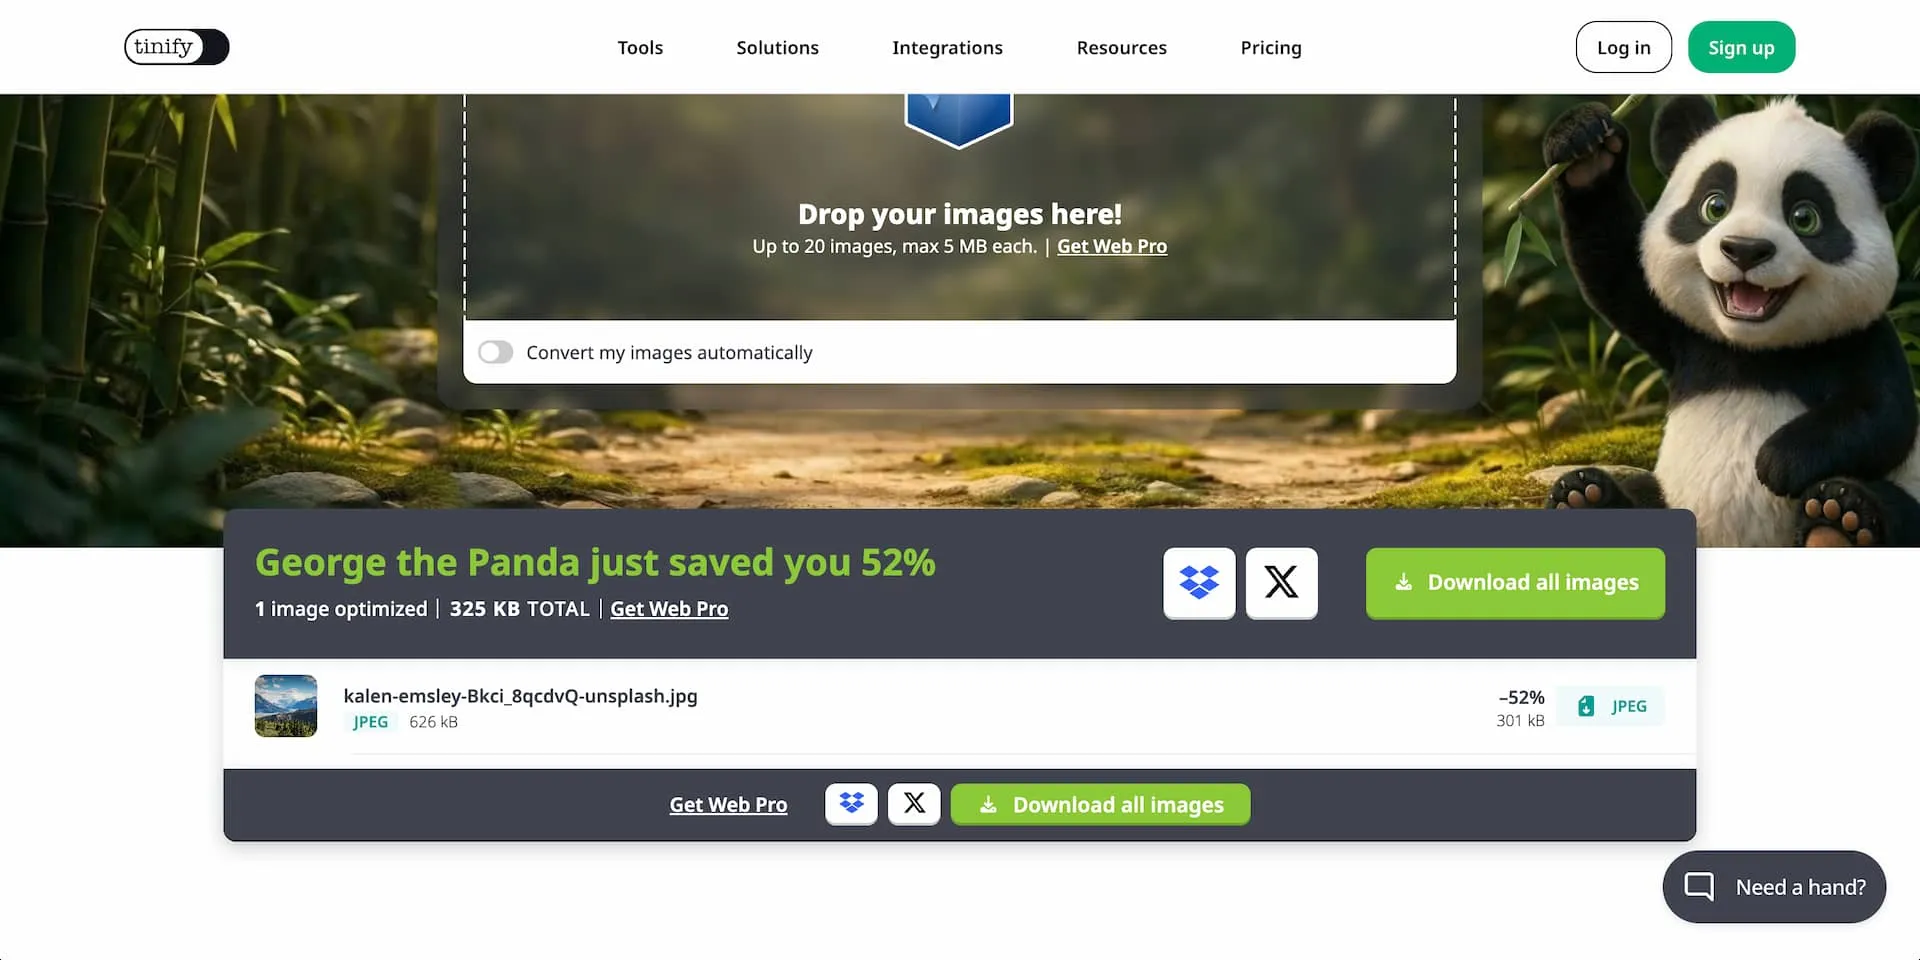
TinyPNG automatically processes your images after uploading.
Once compression finishes, you’ll see the original file size, compressed file size, and percentage saved.
Step 3: Download the Results
Click Download to save an individual image, or use the batch download option to download multiple compressed images together.
Why Choose TinyPNG?
TinyPNG is a convenient choice if you want fast compression without adjusting technical settings.
It’s especially useful for compressing several product photos quickly. However, it offers less control over image quality than Squoosh.
3. ImageOptim — Best Free Image Compressor for Mac
ImageOptim is a free, open-source image optimization application for macOS.
It combines image optimization techniques to reduce file sizes and can remove unnecessary metadata from image files.
Unlike online tools, ImageOptim runs directly on your Mac.
How to Compress Images Using ImageOptim
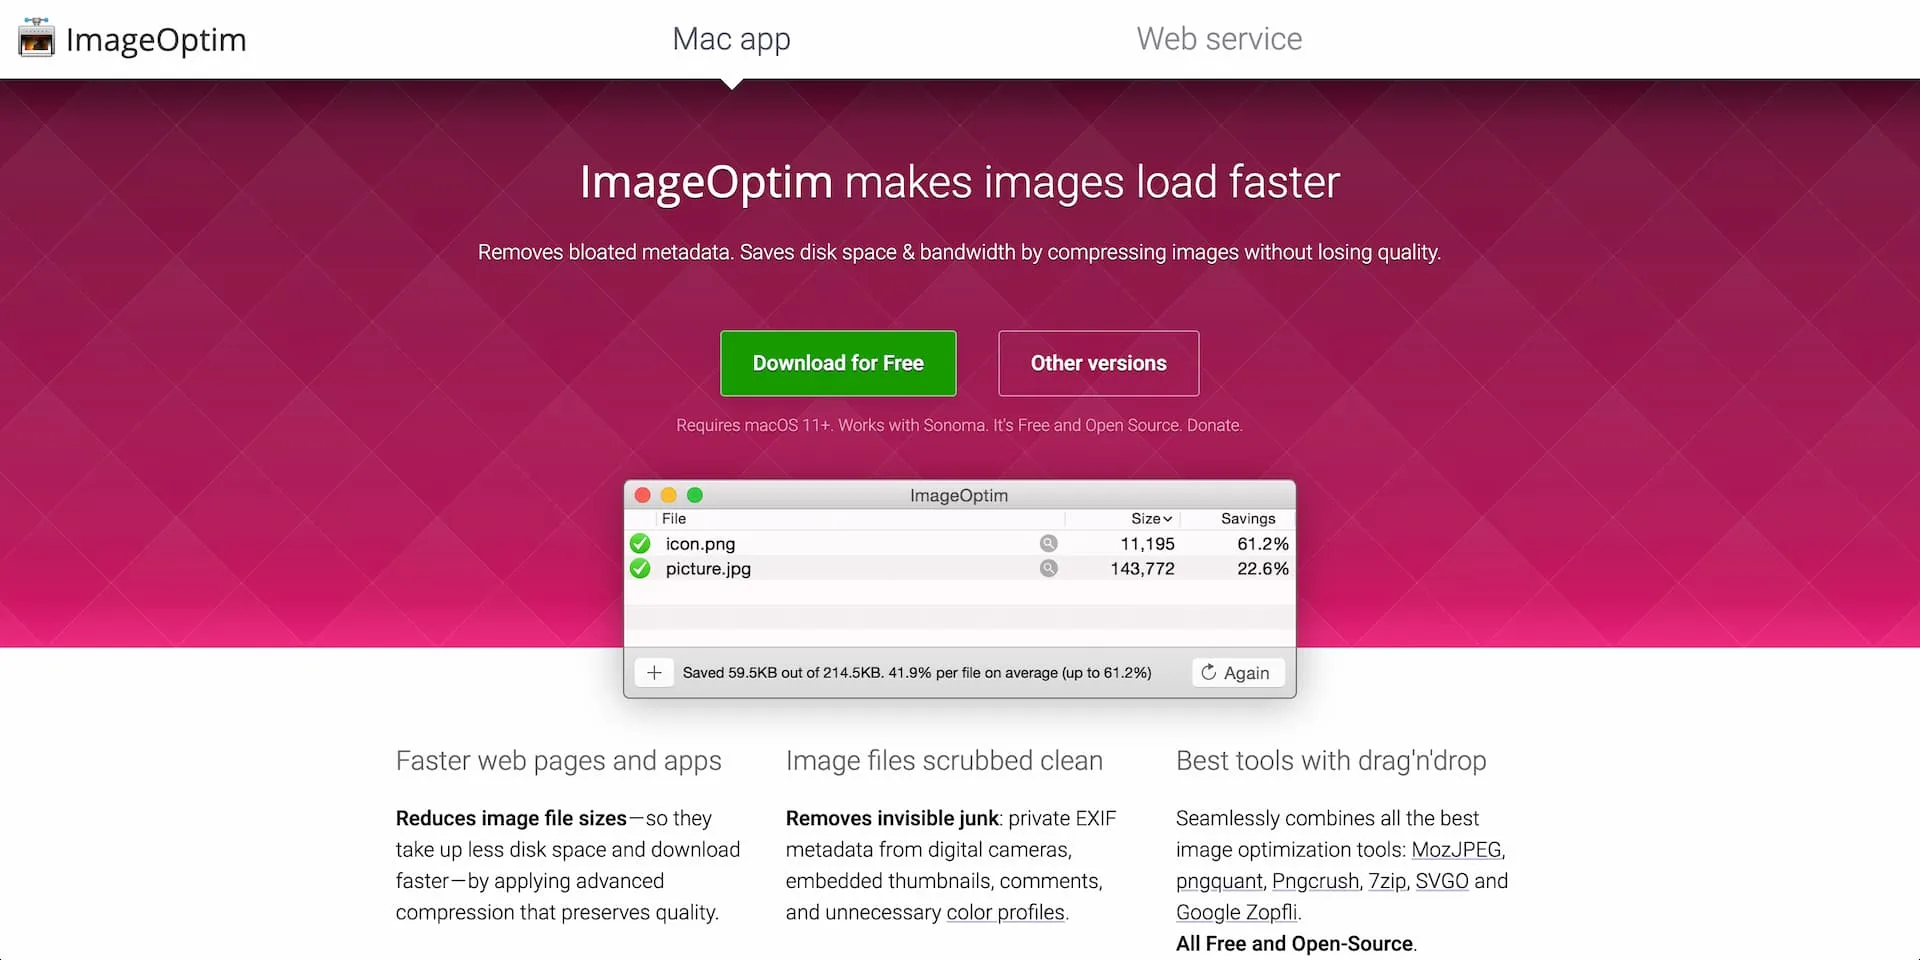
Step 1: Download ImageOptim
Visit ImageOptim and download the macOS application.
After installation, open ImageOptim.
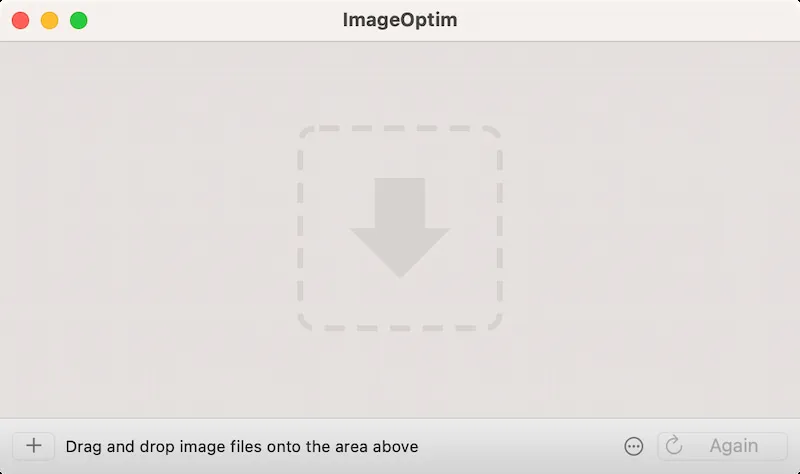
Step 2: Add Your Images
Drag your images into the application window.
ImageOptim automatically starts optimizing them, and you can process multiple files at once.
Step 3: Review the Results
Once processing finishes, ImageOptim displays the file size savings for each image.
Important: ImageOptim replaces the files you add with their optimized versions. The original files are moved to the Trash as a precaution, but keeping a separate backup is still recommended.
Why Choose ImageOptim?
ImageOptim is a good option for Mac users who want a simple desktop compression workflow.
Its drag-and-drop interface makes it convenient for processing multiple product images without uploading them to a website.
4. Caesium Image Compressor — Best for Batch Compression
Caesium Image Compressor is a free, open-source image compression tool available for Windows and macOS.
It also offers an online version for users who prefer compressing images through a browser.
Caesium supports common image formats and is particularly useful for batch processing.
How to Compress Images Using Caesium
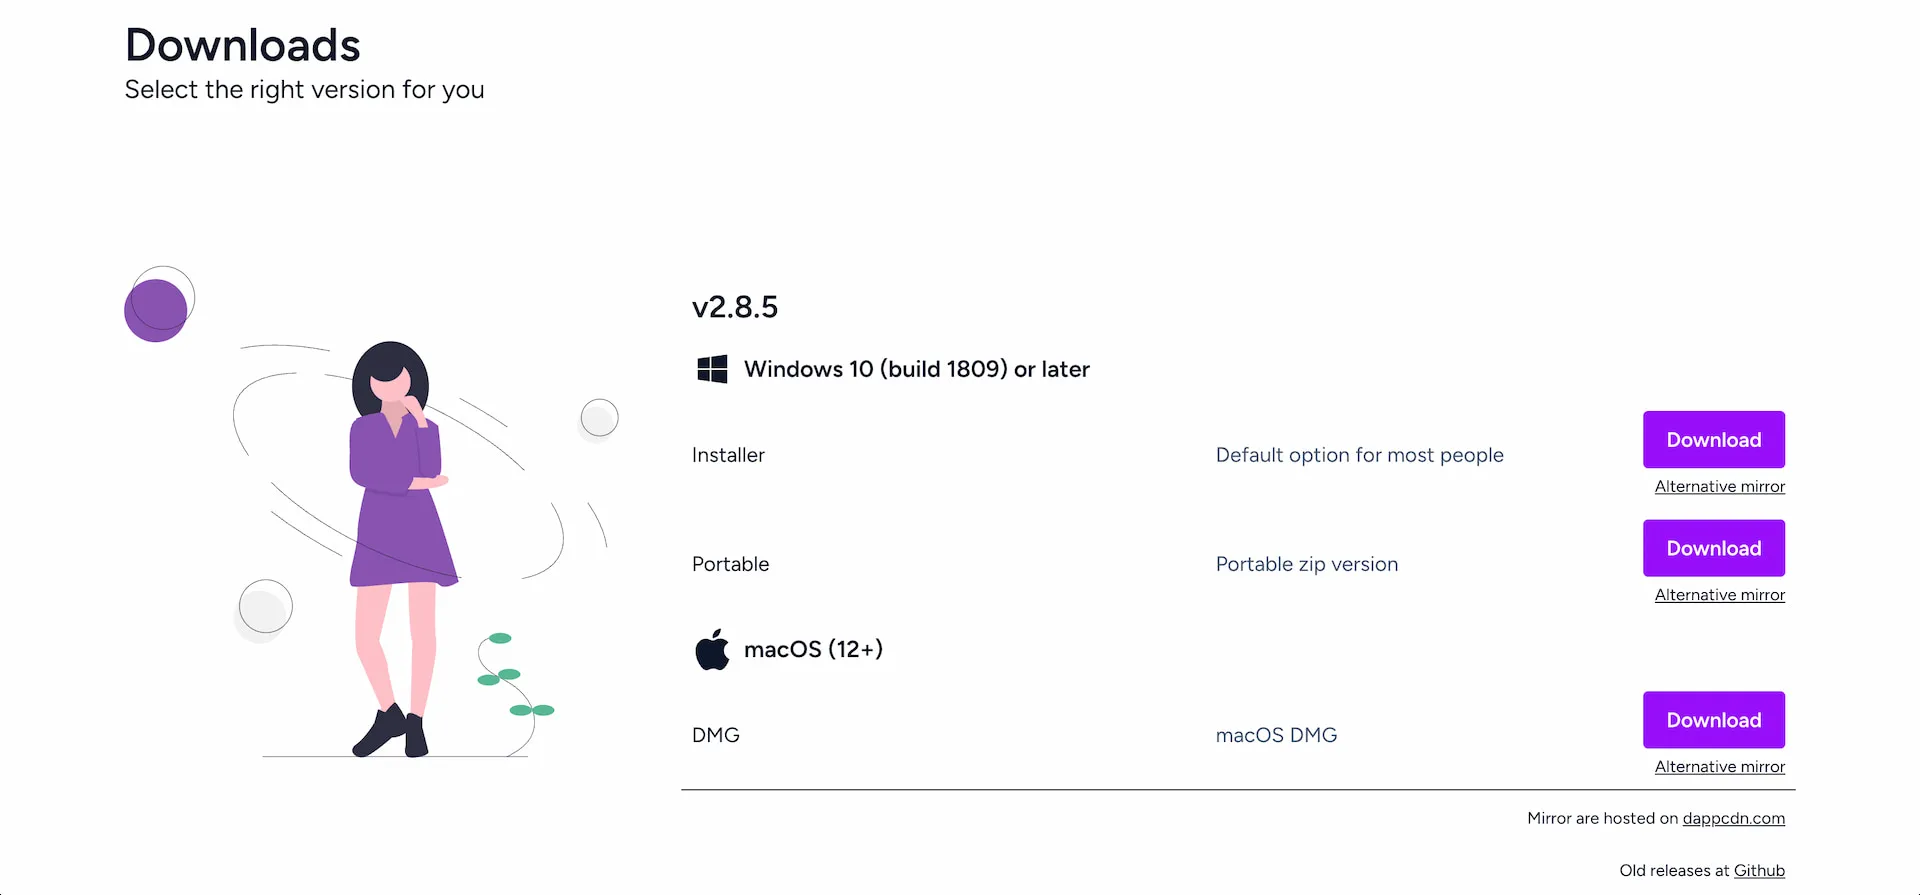
Step 1: Download Caesium
Visit the Caesium website and download the desktop application for your operating system.
Alternatively, you can use the online compressor.
Step 2: Add Your Images
Open Caesium and drag your images into the workspace.
You can add multiple files and process them together.
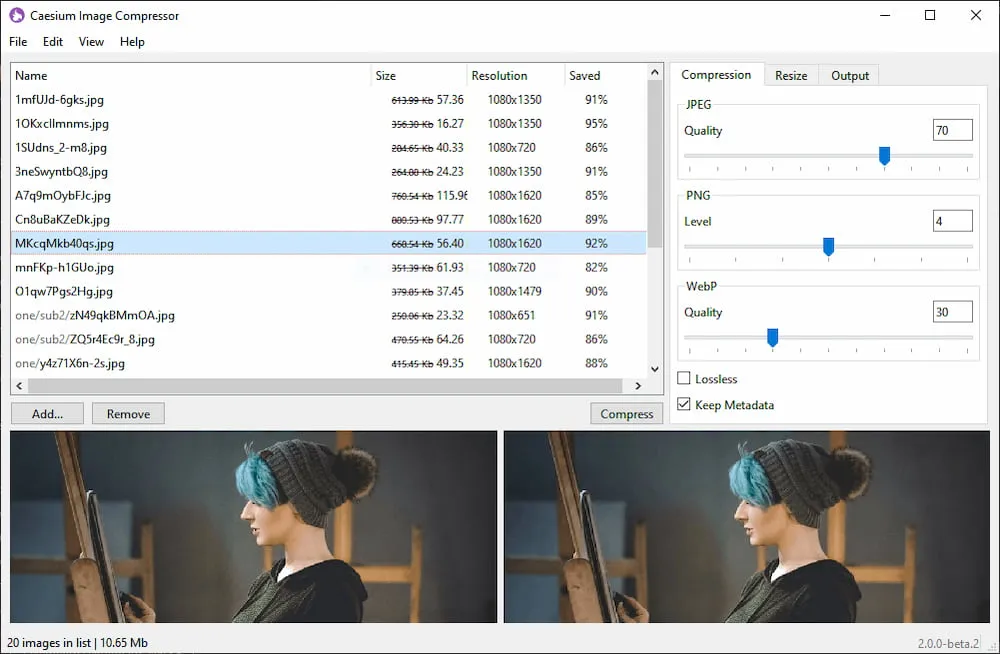
Step 3: Configure Compression Settings
Adjust the available quality and output settings according to your needs.
If your images have unnecessarily large dimensions, consider resizing them before compression.
Step 4: Compress and Save
Choose an output location and start compression.
Once the process finishes, review the optimized images to make sure important details remain clear.
Why Choose Caesium?
Caesium is a practical choice for merchants who regularly prepare large numbers of product images.
Its batch processing capabilities and adjustable settings offer a useful balance between convenience and control.
Which Image Compression Tool Should You Choose?
The best tool depends on how you work with images.
- Squoosh: Best for comparing image quality and fine-tuning compression settings.
- TinyPNG: Best for quick, automatic online compression.
- ImageOptim: Best for Mac users who prefer a simple desktop workflow.
- Caesium: Best for batch compression with adjustable settings.
For most Shopify merchants, Squoosh and TinyPNG are good starting points. If you regularly optimize large numbers of images, ImageOptim or Caesium may be more convenient.
Best Practices for Optimizing Shopify Images
Using an image compressor is helpful, but there are a few other things worth considering.
Choose the Right Image Format
JPEG is suitable for most product photography, while PNG is useful when transparency or lossless image data is needed.
WebP can often provide smaller files at comparable visual quality.
Shopify also automatically delivers optimized image formats to supported browsers, so manually converting every image to WebP isn’t always necessary.
Use Appropriate Image Dimensions
Avoid uploading unnecessarily large images.
For square Shopify product photos, 2048 × 2048 pixels is a useful starting point in many cases, especially when image zoom is important.
However, the ideal dimensions depend on your theme and how images are displayed.
Add Descriptive File Names and Alt Text
Image optimization isn’t just about file size.
Use descriptive file names, such as black-leather-crossbody-bag.jpg, instead of generic names like IMG_2048.jpg.
Add meaningful alt text that accurately describes the image. This helps with accessibility and gives search engines more context.
Check Your Store’s Performance
Use Google PageSpeed Insights to evaluate your store’s performance after optimizing images.
Pay attention to mobile performance and image-related recommendations.
Remember that themes, apps, and JavaScript can also affect loading speed, so image compression alone won’t solve every performance issue.
Frequently Asked Questions
Does Shopify Automatically Compress Images?
Yes. Shopify automatically optimizes images delivered through its image infrastructure, including resizing and format optimization.
However, preparing appropriately sized images before uploading them can still be useful.
What Is the Best Free Image Compression Tool for Shopify?
Squoosh is a great choice for controlling compression quality, while TinyPNG is ideal for quick, automatic optimization.
ImageOptim and Caesium are useful alternatives for desktop and batch compression workflows.
Does Image Compression Reduce Quality?
It depends on the compression method.
Lossless compression preserves image data, while lossy compression removes some information to achieve smaller file sizes.
With appropriate settings, lossy compression can reduce file sizes without noticeable quality loss during normal viewing.
Do I Need a Shopify Image Compression App?
Not necessarily.
Shopify already provides automatic image optimization, and the tools in this guide allow you to prepare images before uploading them.
A dedicated app may be useful if you need additional features, such as bulk image management or automated workflows.
Final Thoughts
Optimizing images is a simple way to help improve your Shopify store’s performance without sacrificing visual quality.
Squoosh, TinyPNG, ImageOptim, and Caesium Image Compressor all provide free ways to reduce image file sizes.
Choose the tool that fits your workflow, check the results before uploading, and focus on maintaining clear, attractive product images while keeping file sizes reasonable.
Support & Share
If this article helped you, please share or support!